
In this second part, we will be going over the programming and network information for this project to control and automate home media devices using Alexa and IR/RC controllers. If you missed part one, the above link will take you to it. The Arduino files and additional simple examples I use can be found at this Github repository.
In this specific article, I will be going over my code and setup for the radio-controlled projector screen and the IR-controlled fireplace. I will show how to configure the network so that the ESP8266 controller can be accessed through Alexa or a custom webapp.
Connect to Wifi
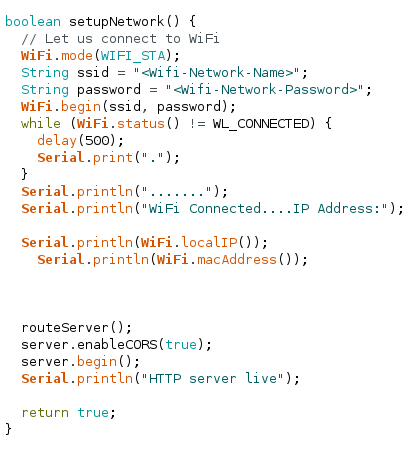
We first need to configure the Wifi connection for the ESP8266. We can create a function called setupNetwork() like below, being sure to replace the <Wifi-Network-Name> and <Wifi-Network-Password> fields with their respective values.
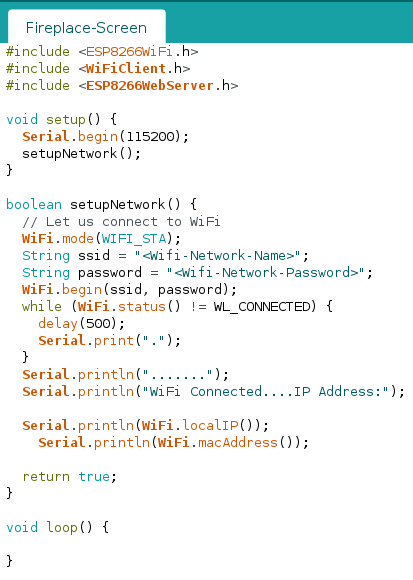
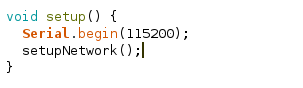
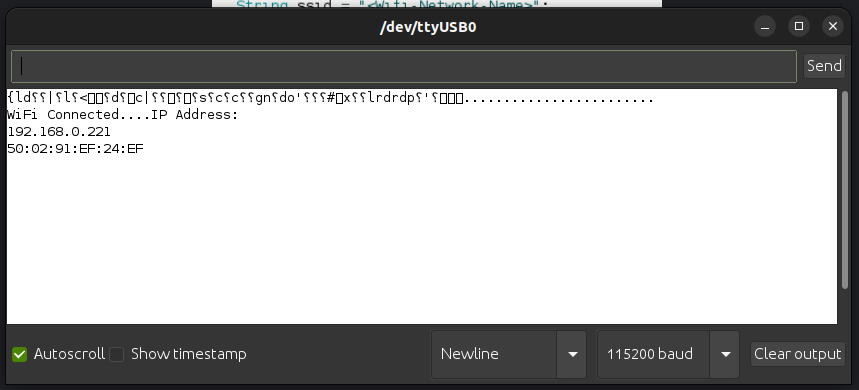
We will call this function in the setup() function so that when the ESP8266 starts up it will automatically connect to Wifi and print out its IP address to the Serial Monitor. Your code should match below:
Assign a Static IP
Next we need to set a static IP for the ESP8266 so that your home router does not change its IP address and cause us to lose connection to it. Go to your router’s gateway page or app and find the DHCP settings.
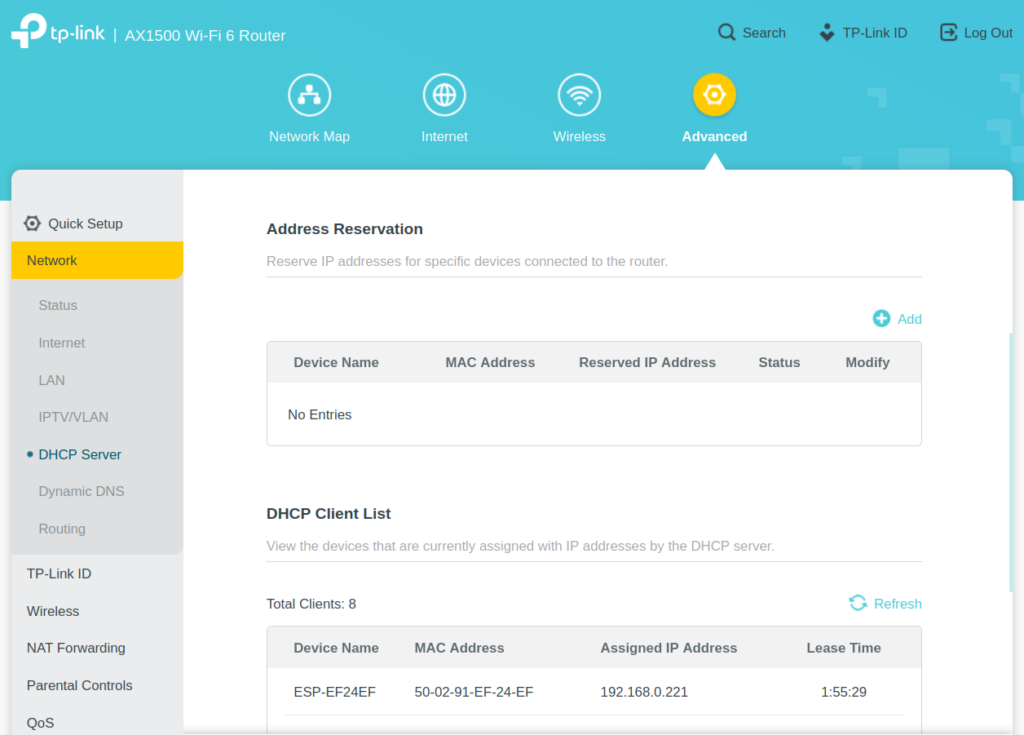
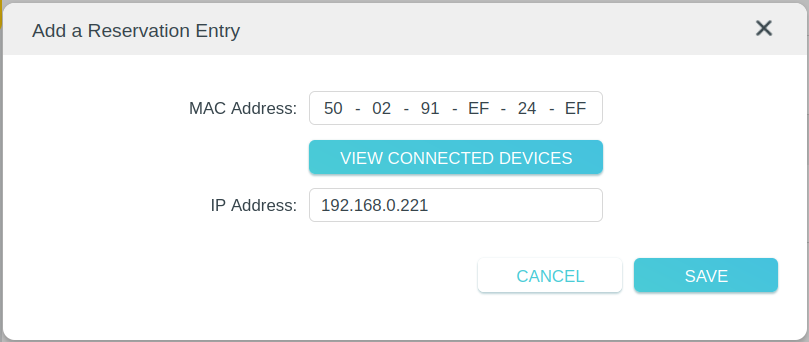
Find the section for reserving addresses and add a new entry using the ESP8266’s IP Address and Mac Address. This will insure that the Router assigns the same IP address to our ESP8266 every time it connects.
Fauxmo
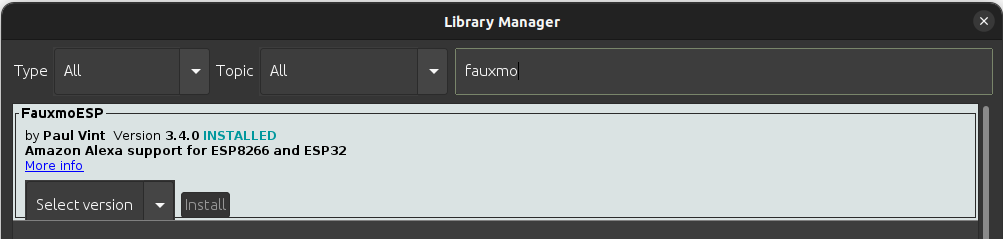
Install the Fauxmo library using the library manager. Fauxmo will allow us to make a device available on Alexa for turning on or off. It emulates a Wemo device and will look like a smart lightbulb on the Alexa side.
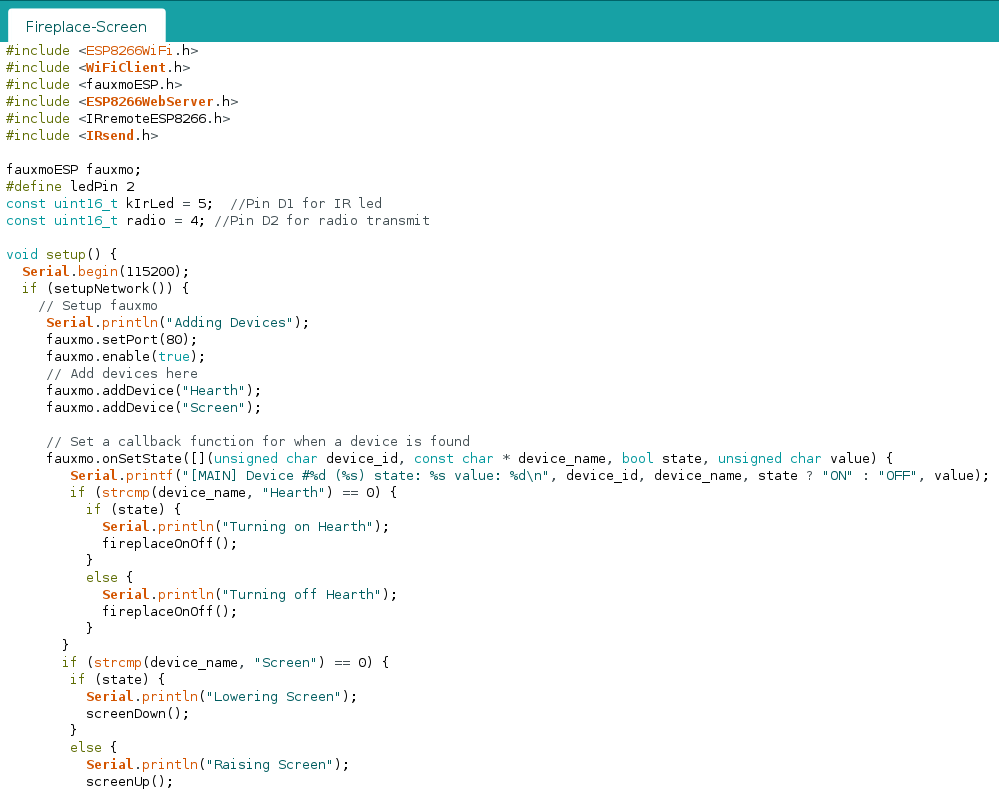
Add #include <fauxmoESP.h> to the top of your arduino file. Declare a variable: fauxmoESP fauxmoESP. Add the following to the setup() function:
void setup() {
  Serial.begin(115200);
  if (setupNetwork()) {
    // Setup fauxmo
     Serial.println("Adding Devices");
     fauxmo.setPort(80);
     fauxmo.enable(true);
     // Add devices here
     fauxmo.addDevice("Hearth");
     fauxmo.addDevice("Screen");

     // Set a callback function for when a device is found
     fauxmo.onSetState([](unsigned char device_id, const char * device_name, bool state, unsigned char value) {
        Serial.printf("[MAIN] Device #%d (%s) state: %s value: %d\n", device_id, device_name, state ? "ON" : "OFF", value);
        if (strcmp(device_name, "Hearth") == 0) {
          if (state) {
            Serial.println("Turning on Hearth");
            fireplaceOnOff();
          }
          else {
            Serial.println("Turning off Hearth");
            fireplaceOnOff();
          }
       }
       if (strcmp(device_name, "Screen") == 0) {
        if (state) {
          Serial.println("Lowering Screen");
          screenDown();
        }
        else {
          Serial.println("Raising Screen");
          screenUp();
        }
       }
     });
  }
}
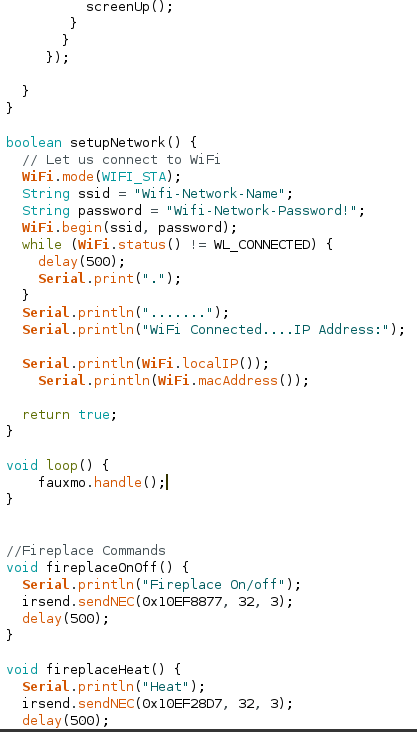
Make sure to modify the loop() function to have fauxmo.handle(). Also add in your functions for sending IR/RC commands to your devices. Part 1 goes over how to make these commands. These will be used as callback functions for fauxmo to turn on or off our devices. The complete code can be found at this link. Deploy this to your ESP8266 and it will be ready for configuration in the Amazon Alexa app.
Configuring in Alexa
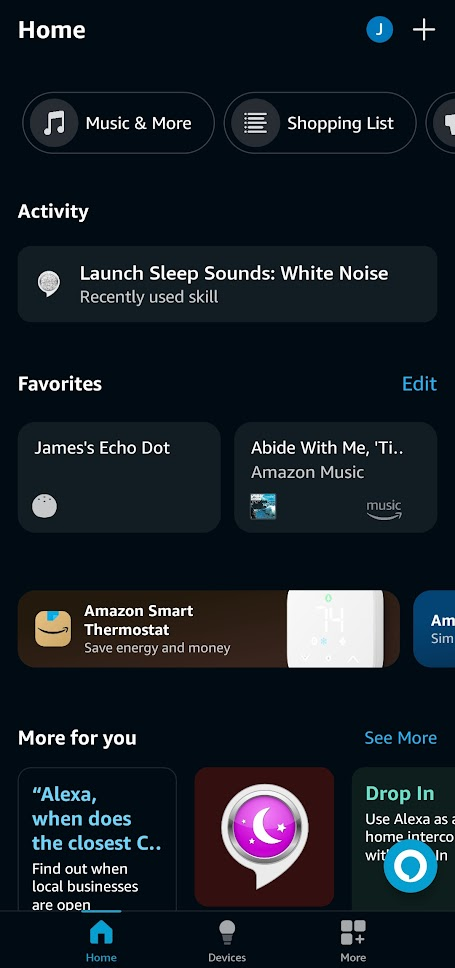
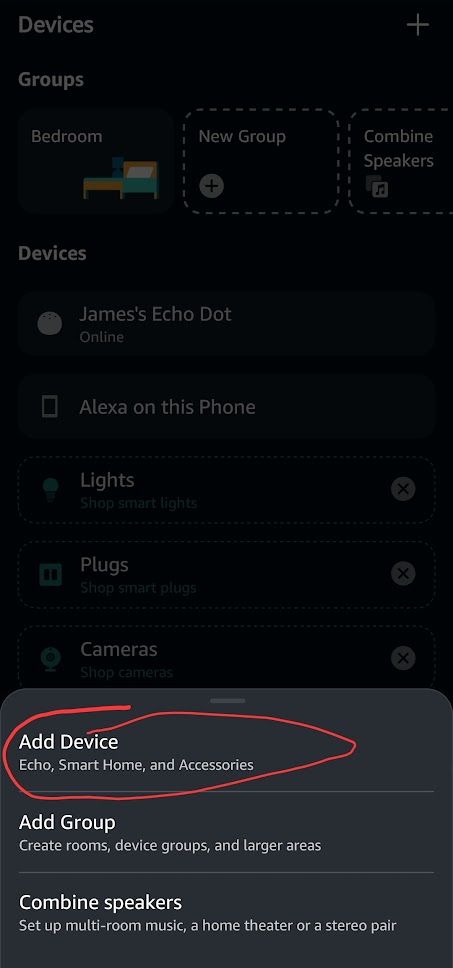
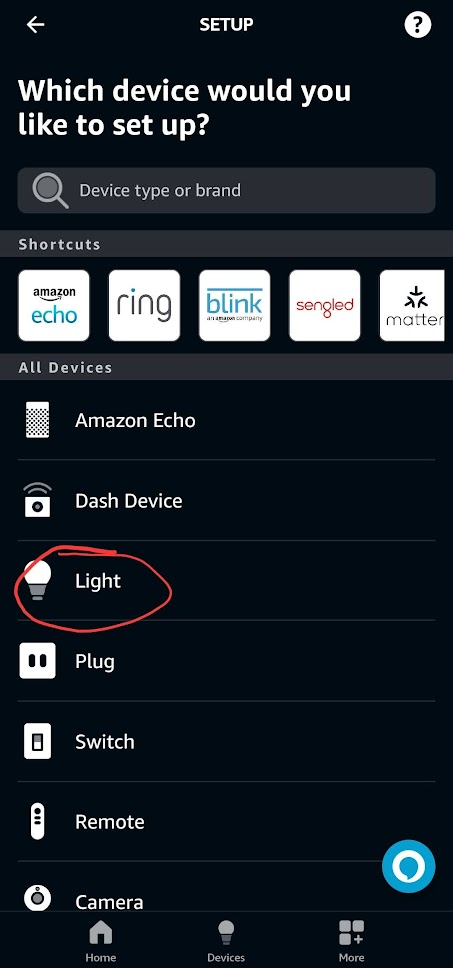
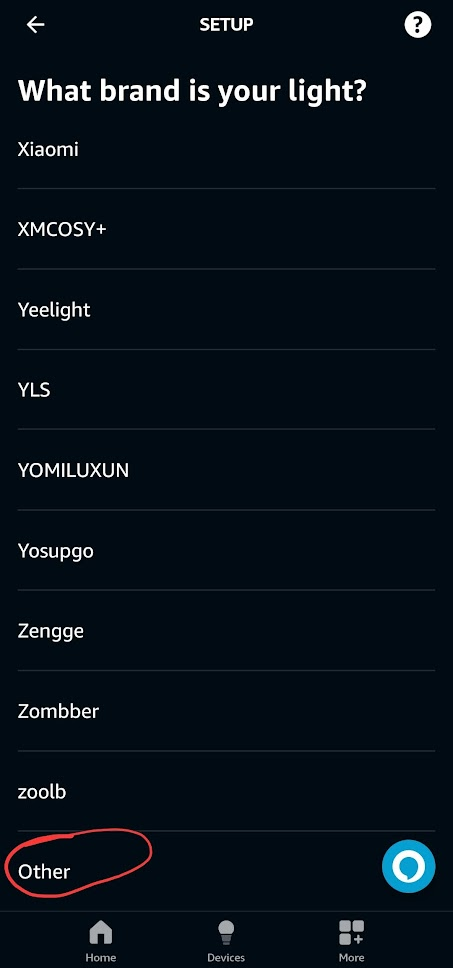
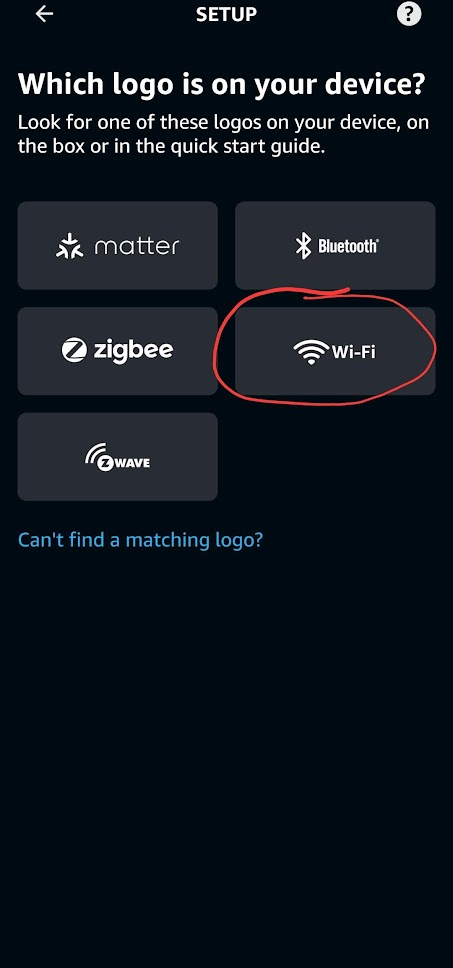
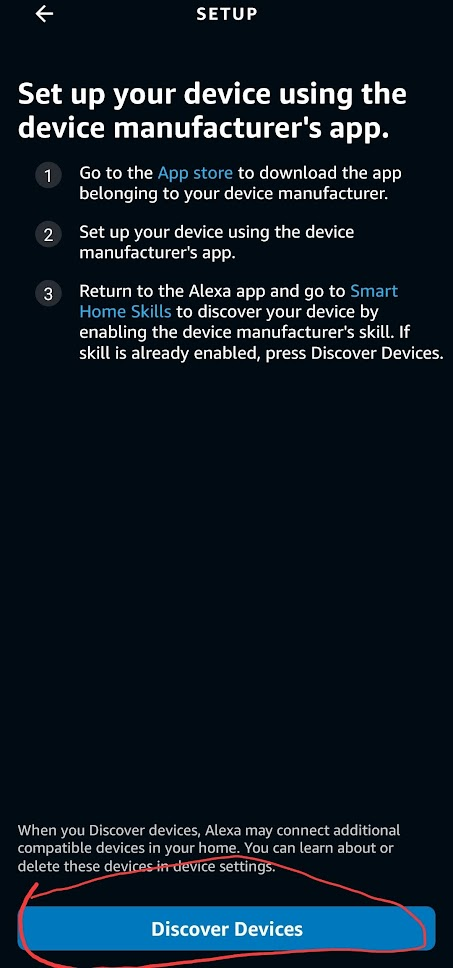
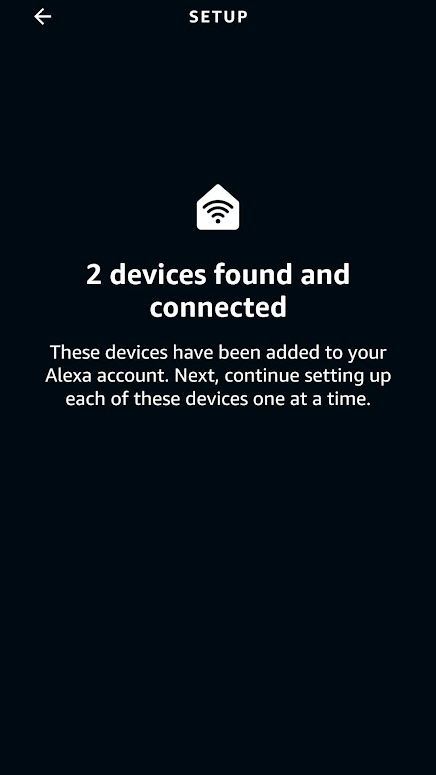
Setting up in Alexa is extremely easy. Once the sketch is deployed to the ESP8266 and the ESP8266 is running fauxmo, it will appear as a smart light when Alexa scans the network for devices. You can ask Alexa to add a device and it will automatically find it or you can follow the screenshots below from the Alexa app.
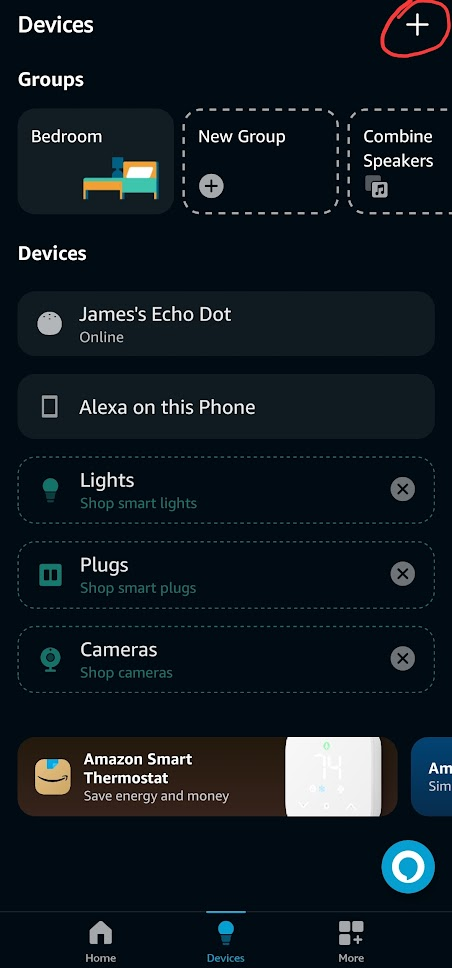

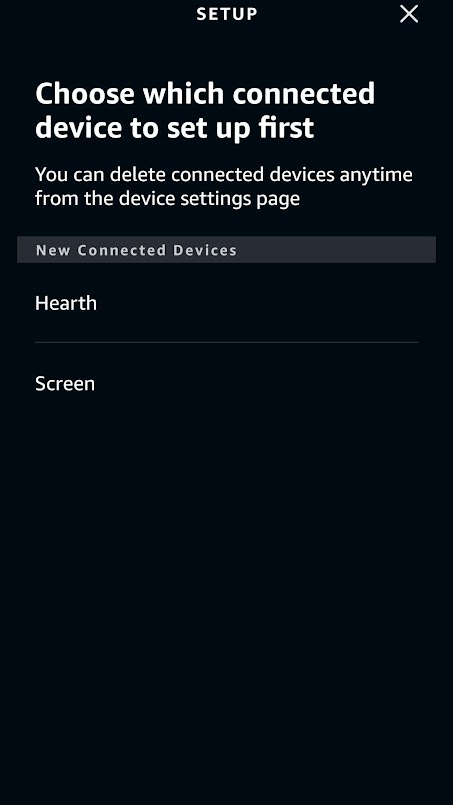
At this point you should be able to ask Alexa to turn on and off your devices successfully. The name of the devices will be the same as the name in the argument to fauxmo.addDevice(“Name”);
Creating a Rest API
The last step in setting up our home media devices is mapping all the different IR/RC commands to endpoints that can be called through network requests.
In the simple example file for sending IR signals, there are three important parts for setting up the Rest API. The first is the routeServer() function in which we will define the endpoints that can be called.
//Server Routing

void routeServer () {
  // Define a default response to the server w/o path
  server.on("/", HTTP_GET, []() {
        server.send(200, F("text/html"),
            F("ESP8266 Controller Basement"));
    });

  // Create endpoints and connect them to corresponding functions
  server.on("/rcDeviceOn", HTTP_GET, RCDeviceOn);
  server.on("/rcDeviceOff", HTTP_GET, RCDeviceOff);
  server.on("/rcDeviceStop", HTTP_GET, RCDeviceStop);

// If endpoint called that doesn't exist, call handleNotFound()
  server.onNotFound(handleNotFound);
}
Each server.on(“/path”, Method, Function) defines an endpoint that can be called with an https request to serveraddress:port/path.
The next important function is setupNetwork() where we previously set up the wifi connection. We need to add a call to routeServer(), enable CORS, and start the server.
boolean setupNetwork() {
  // Let us connect to WiFi
  WiFi.mode(WIFI_STA);
  String ssid = "<Wifi-Network-Name>";
  String password = "<Wifi-Network-Password>";
  WiFi.begin(ssid, password);
  while (WiFi.status() != WL_CONNECTED) {
    delay(500);
    Serial.print(".");
  }
  Serial.println(".......");
  Serial.println("WiFi Connected....IP Address:");

  Serial.println(WiFi.localIP());
    Serial.println(WiFi.macAddress());


  // call the routeServer()
  routeServer();
  // enable CORS
  server.enableCORS(true);
 // start the server
  server.begin();
  Serial.println("HTTP server live");

  return true;
}
The third function is handleNotFound() which is called when an endpoint that doesn’t exist receives a request. It simply sends back to the requesting client a 404: Not Found error.
void handleNotFound()
{
    if (server.method() == HTTP_OPTIONS)
    {
        server.sendHeader("Access-Control-Allow-Origin", "*");
        server.sendHeader("Access-Control-Max-Age", "10000");
        server.sendHeader("Access-Control-Allow-Methods", "PUT,POST,GET,OPTIONS");
        server.sendHeader("Access-Control-Allow-Headers", "*");
        server.send(204);
    }
    else
    {
        server.send(404, "text/plain", "");
    }
}
Lastly, to get the server actually going we need to #include <ESP8266WebServer.h> at the top and declare a server variable on port 81
ESP8266WebServer server(81);We should also have a function like this to handle requests to the server and fauxmo
void loop() {
fauxmo.handle();
server.handleClient();
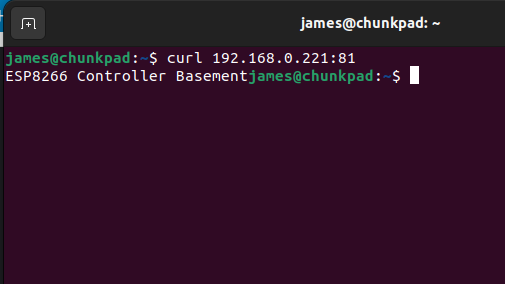
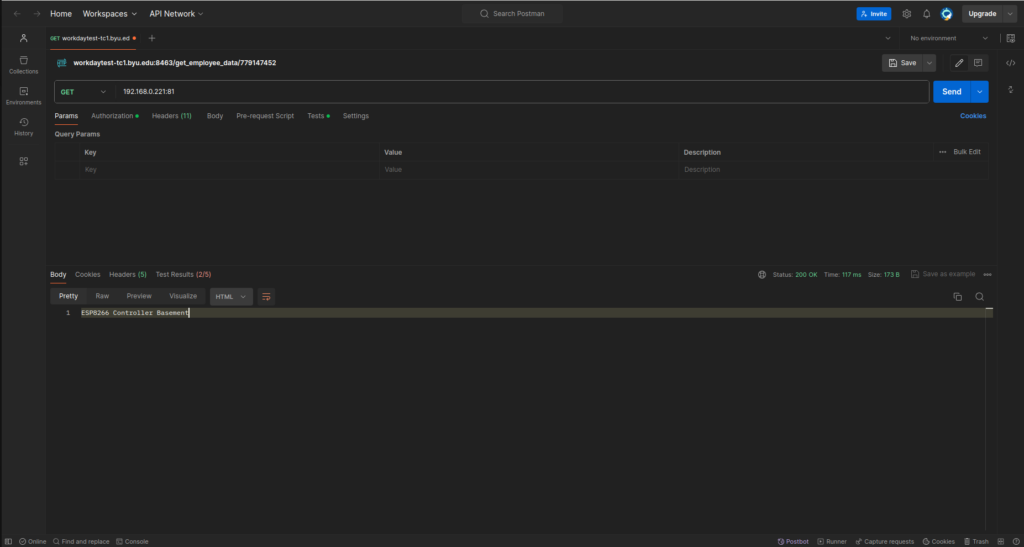
}Deploy to the ESP8266 and you should now be able to send requests to your server. If your ip address was 192.168.0.221 and you set the port to 81, you should be able to use the terminal or software like Postman to test your server’s endpoints.
Calling from a Webapp
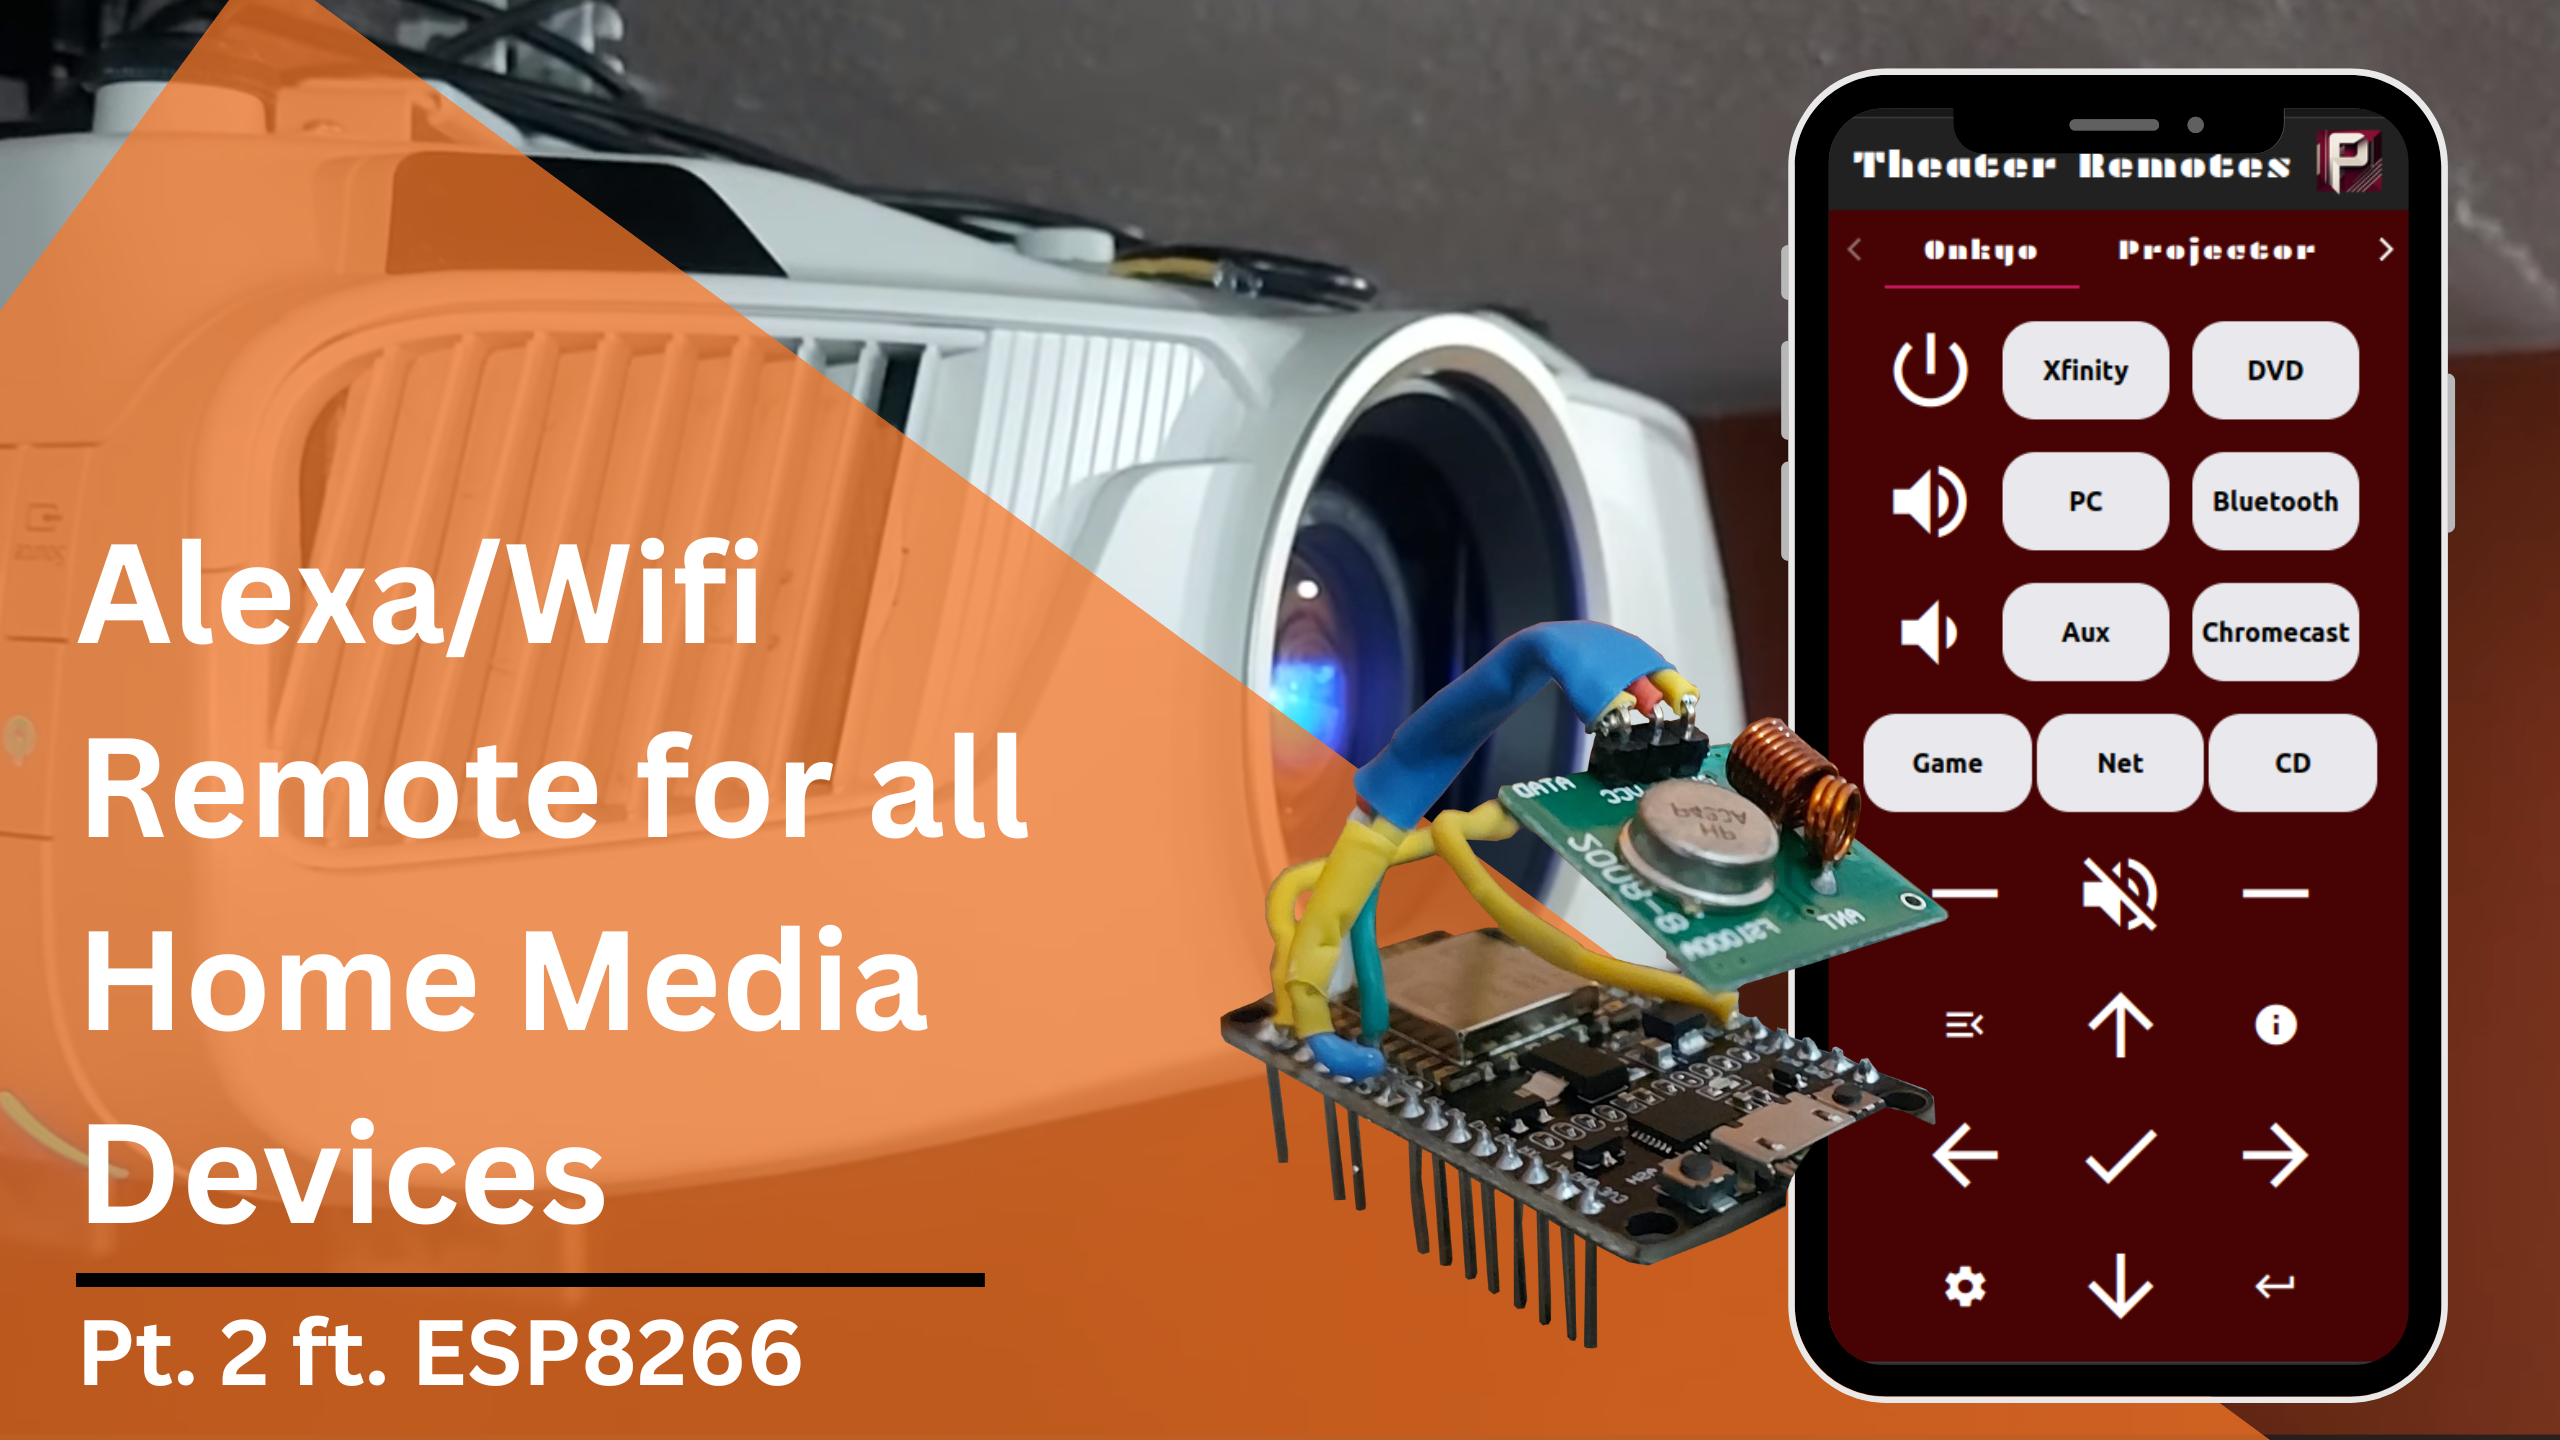
For my use case, I created an angular app that basically consisted of buttons like a remote. When clicked they would call the endpoints on the ESP8266, thus sending the corresponding IR/RC signals to control whatever media device. The webapp runs on an old laptop connected to the home network. The interface of the webapp can be viewed at remotes.jamesephelps.com.
Each button calls a function like this one below to send requests to the ESP8266
 deviceOnOff(): void {
    const url = 'http://192.168.0.23:81/deviceOn';
    this.httpClient.get(url).subscribe(
      (data) => {
        console.log('Response:', data);
      },
      (error) => {
        console.error('Error:', error);
      }
    );
  }