
Last year I was able to snatch a refurbished Thinkpad l15 Gen 2 from Lenovo for $200. Recently I noticed that the USB port on the right didn’t actually work. Upon further inspection I found the pins inside were sunken. After some attempts with tweezers to reposition them so they would come into contact with USB devices, I succeeded in mangling them even worse, insuring they would never work again.
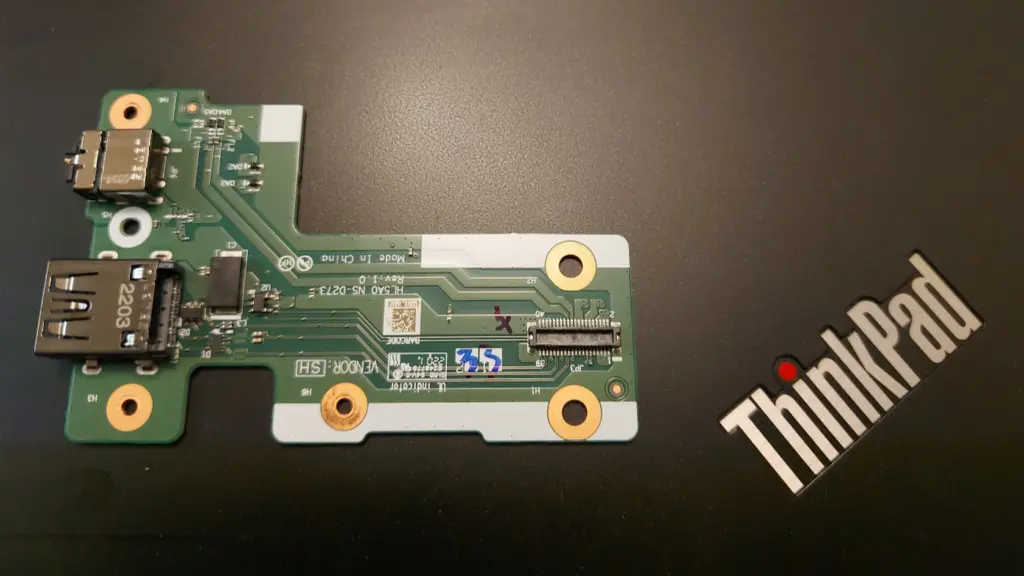
Fortunately, the damaged USB port was the on the right which is part of a USB and 3.5mm audio board, separate from the motherboard. Had it been on the other side, it would have required a motherboard replacement to get a working USB port again. After watching on Ebay for a good price, I was able to find a replacement USB Audio board for $8. For reference, the part number is 5C50S73039.
Installation
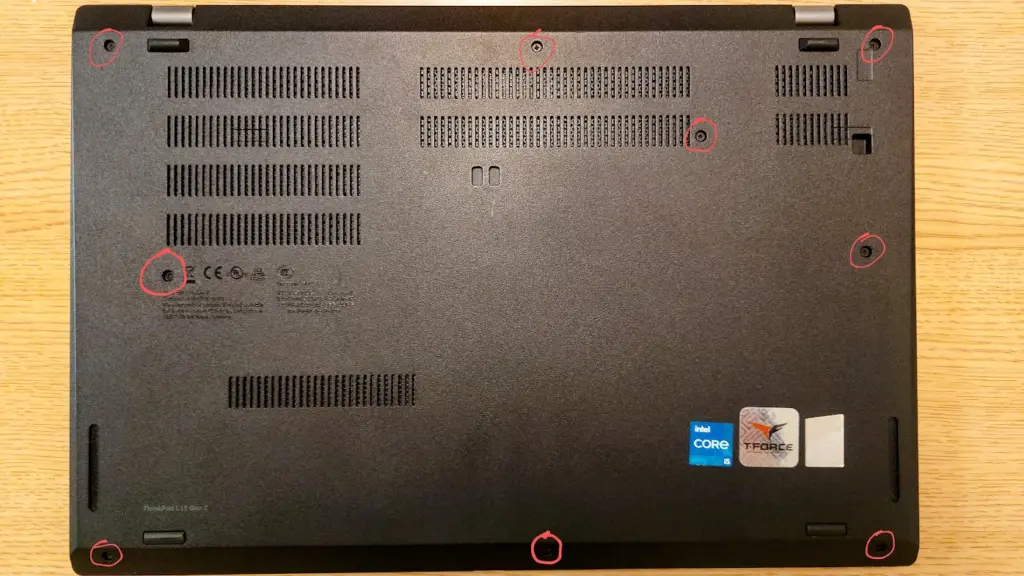
First, remove the bottom panel. There are 9 screws that need to be loosened. They will not come out completely, because the bottom panel holds onto them so they don’t get lost.
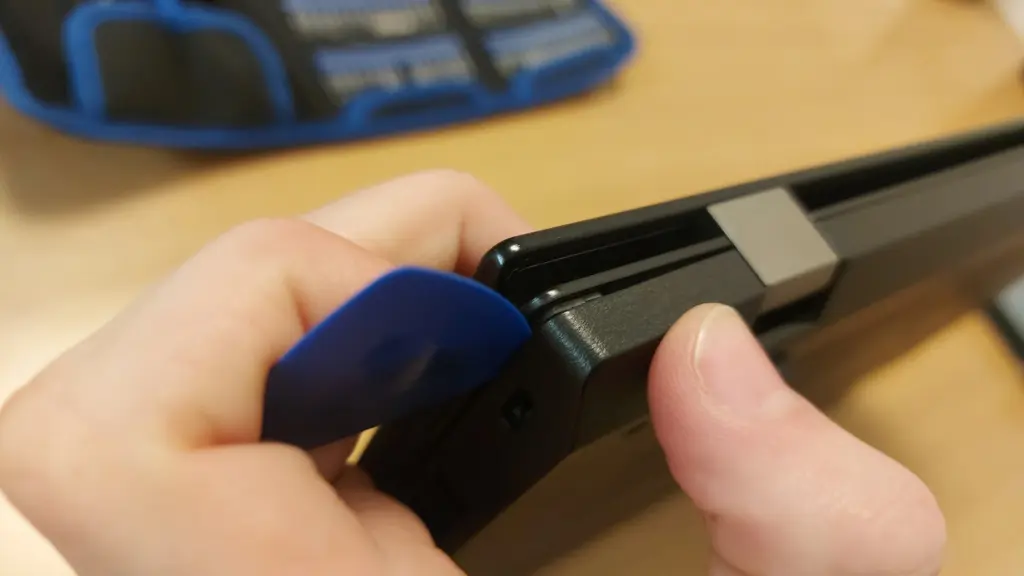
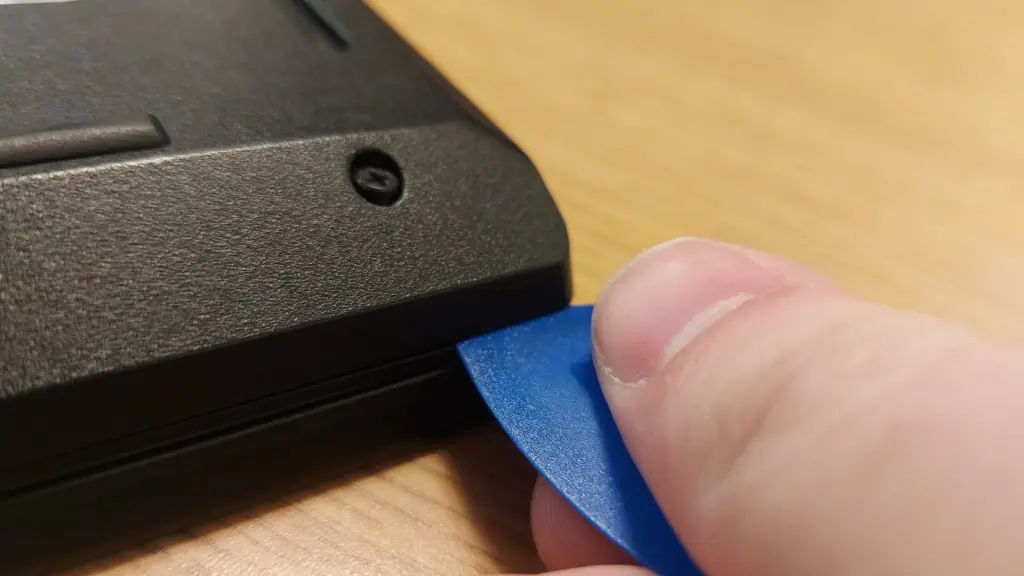
Once the screws are loosened, we need to pry open the hooks holding it onto the laptop. Insert a small, non-metal edge (a credit card could work) into the seam between the panel and laptop. Go around the entire perimeter of the laptop, gently popping it open. You should feel and hear a pop as each hook is undone. Make sure there is no micro sd card in the slot or you won’t be able to pry the panel off.
Once the panel is off, we need to remove the metal cover on the side. This is covering the USB Audio board. Mine had three screws holding it in. After removing the screws, the metal panel should come right off, revealing the USB Audio board.
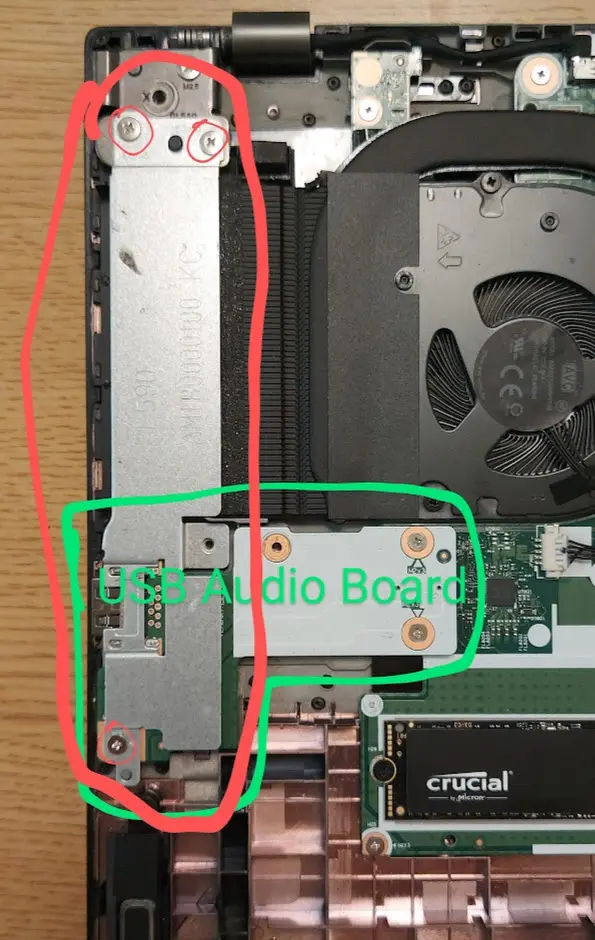
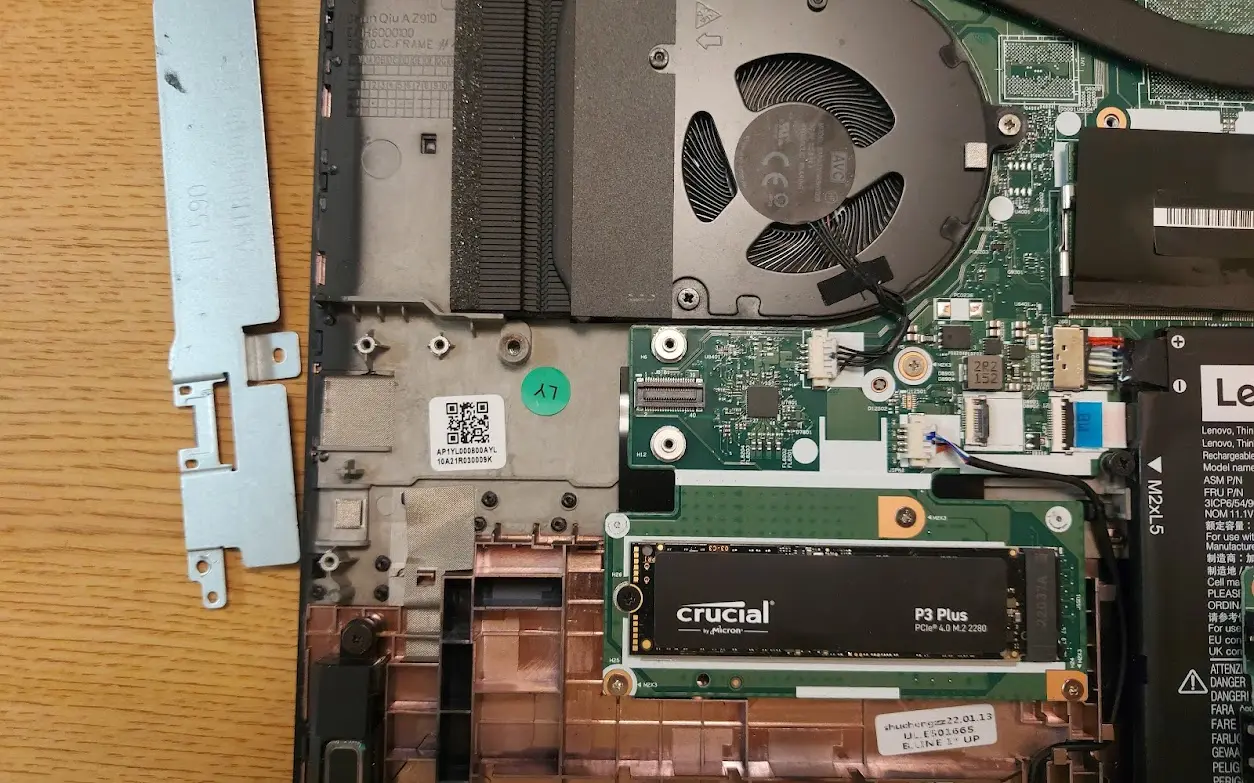
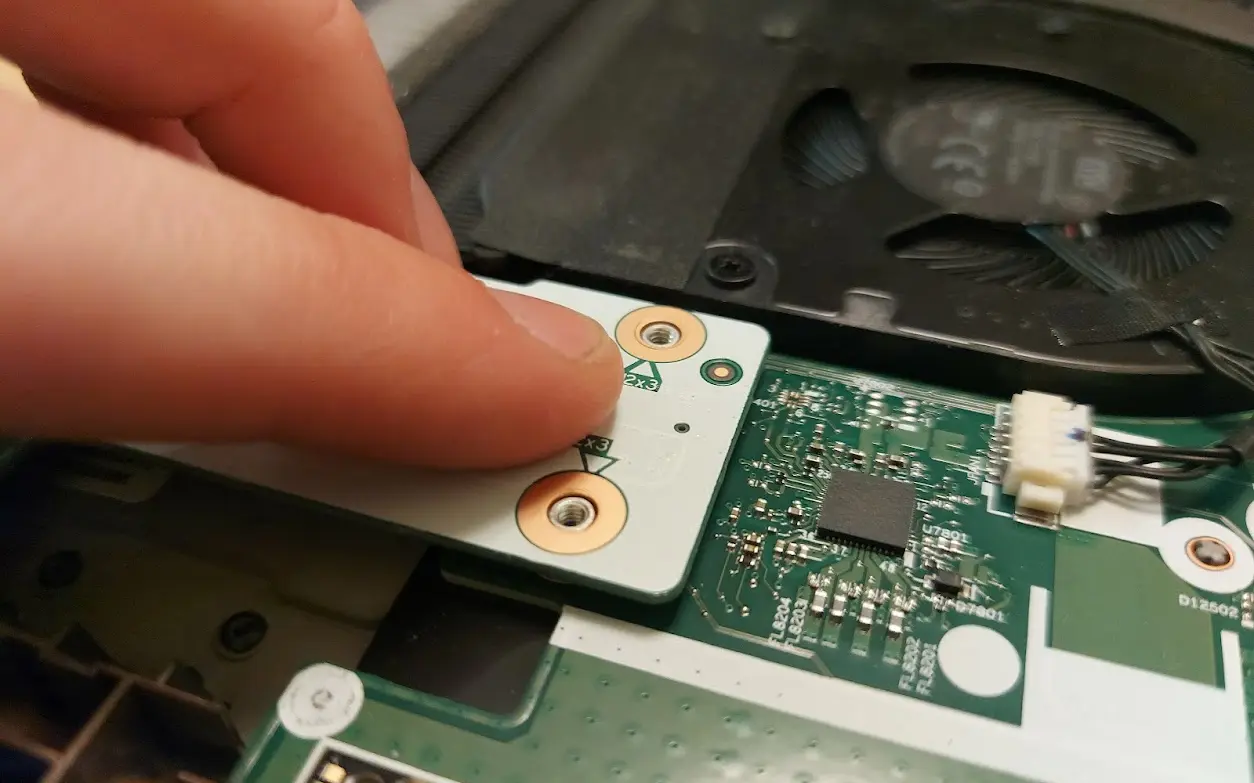
Remove the screws from the USB Audio Board (mine had only three screws again). Then you should be able to gently lift it straight up. It is plugged into the motherboard on the underside, so there will be a little bit of resistance.
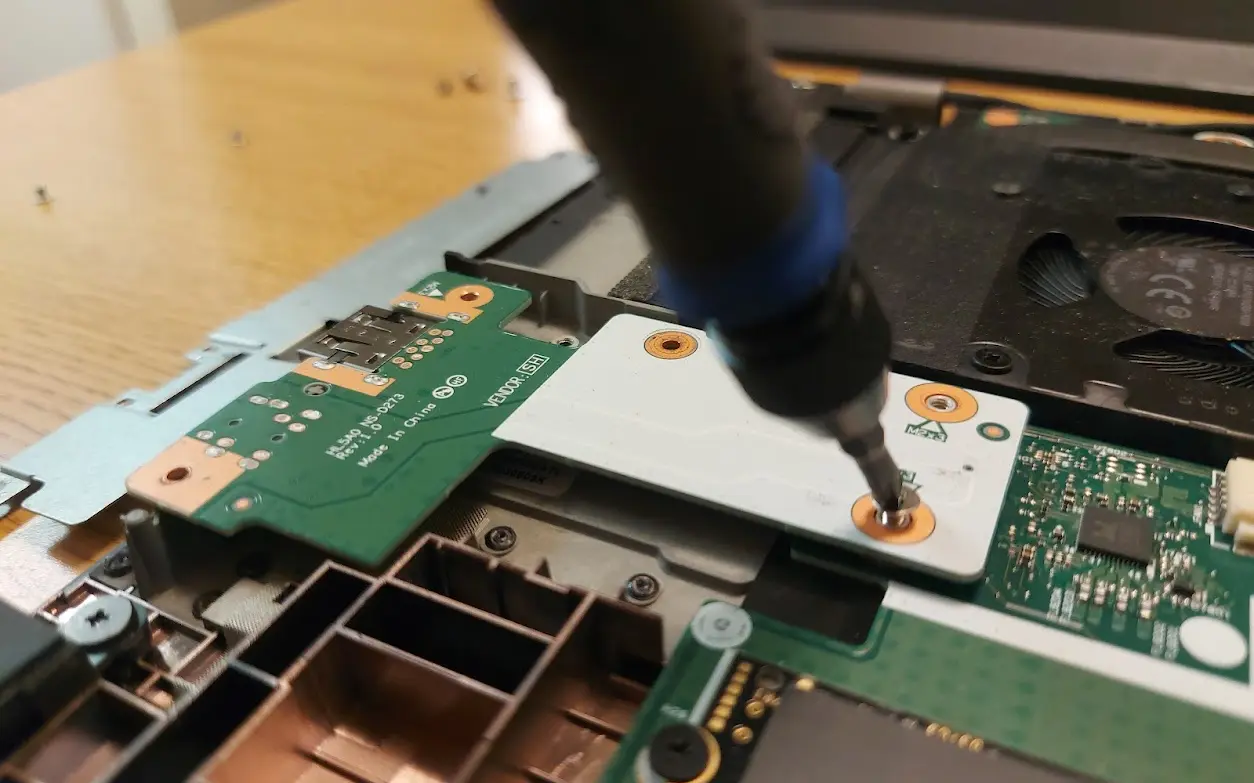
Put the new board into the laptop, using the screw holes as guides to position it correctly. Push the end firmly down to plug it into the motherboard.
Screw the USB Audio Board back in, then the metal plate, and then finally gently press the bottom panel back onto the laptop and re-tighten all of the screws. If done correctly, the new USB and 3.5 mm ports should be fully operational.