The steps to setting up a development for Garmin IQ in the past for Ubuntu 20+ have had some issues with library dependencies, but these seem to have been cleared up in the recent updates. This article will go over how to easily setup the simulator for Garmin devices in conjunction with VSCode on Ubuntu 22.04.
1. Download the SDK
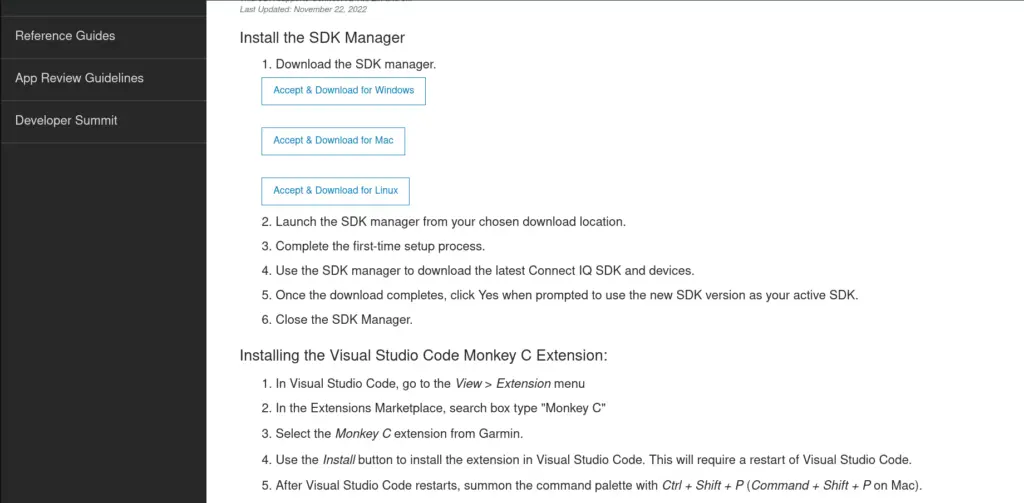
Visit https://developer.garmin.com/connect-iq/sdk/ and read the license agreement. Then accept and download the APK for Linux. It will download a zip file. Extract this to get the bin and share folders. I recommend extracting it to a location outside of your downloads folder so they are not lost later.
Once extracted open the bin folder and double click on the file named ‘sdkmanager.’ This should open a GUI that will download the SDK and devices. If you can not run the executable file you can give it permission to run by right clicking sdkmanager>Poperties>Permission and checking the box next to Execute: Allow Executing File as Program. Or you can navigate to the parent directory in the terminal and use the following command:
sudo chmod +x sdkmanager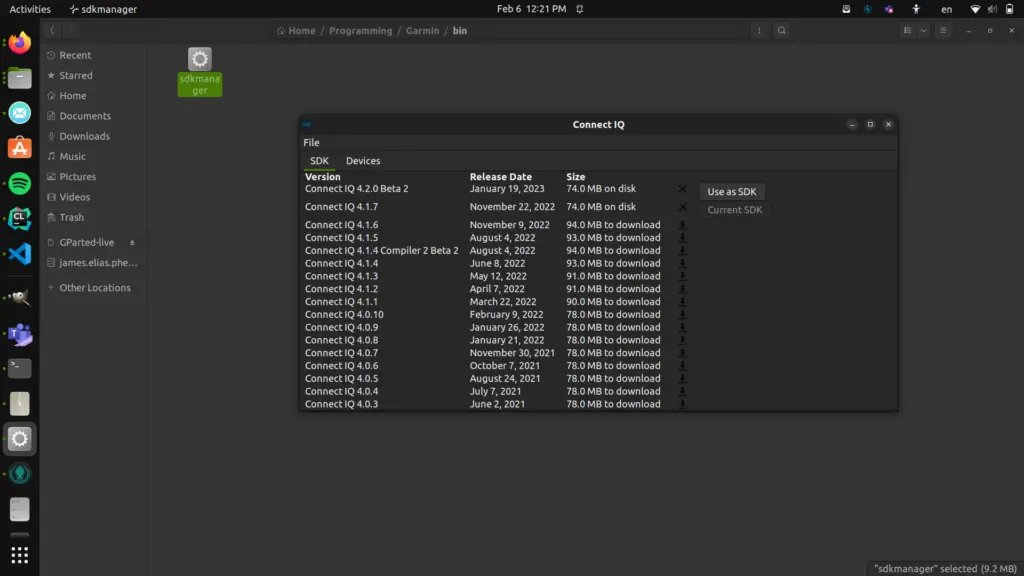
Once the GUI opens up click Use as SDK next to one of the SDK options. You may have to drag the window size out to see the option. You can also manage the Garmin devices it downloads in the Devices tab.
2. Install Monkey C in VSCode
Assuming you have Visual Code Studio installed, open it up and navigate to extensions in the left sidebar. Search for “Monkey C.” Select the option by Garmin and install it.
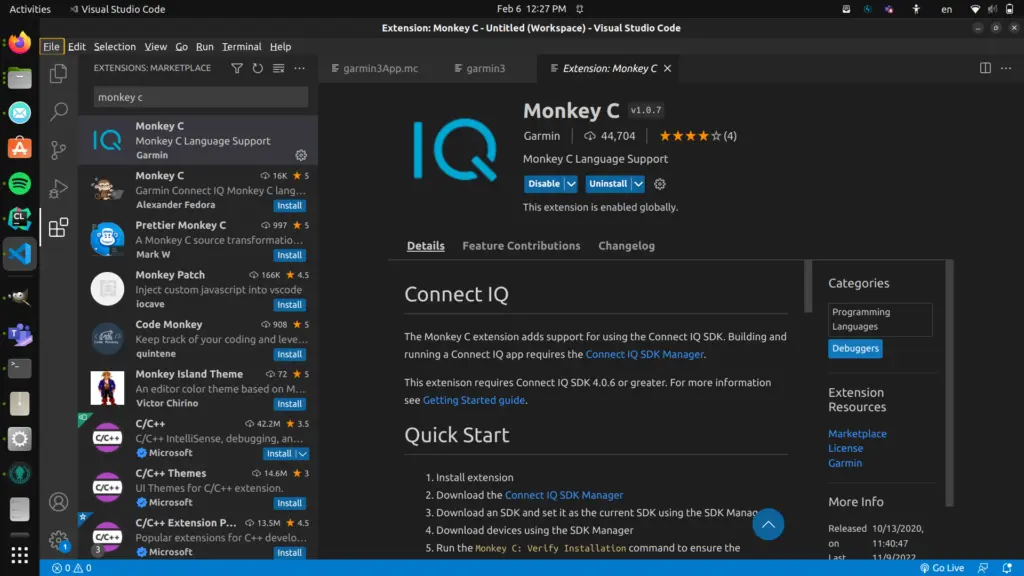
Monkey C is an object oriented programming language created by Garmin for their IQ Connect ecosystem. You can program watchfaces, apps, widgets, and data fields using it. It is meant to be easy to learn and similar to other familiar programming languages. You can read more about it here and get the documentation.
3. Start a Project
Create a folder in which you can store your Monkey C project. Open the folder up in VSCode. Now hit Ctrl+Shift+P. This will open up a command search. Search for the Monkey C: New Project Command.

Follow the prompts to give your project a name, select type as watchface, select simple, and then version 3.0.0. Make sure to put the project in the newly created directory.
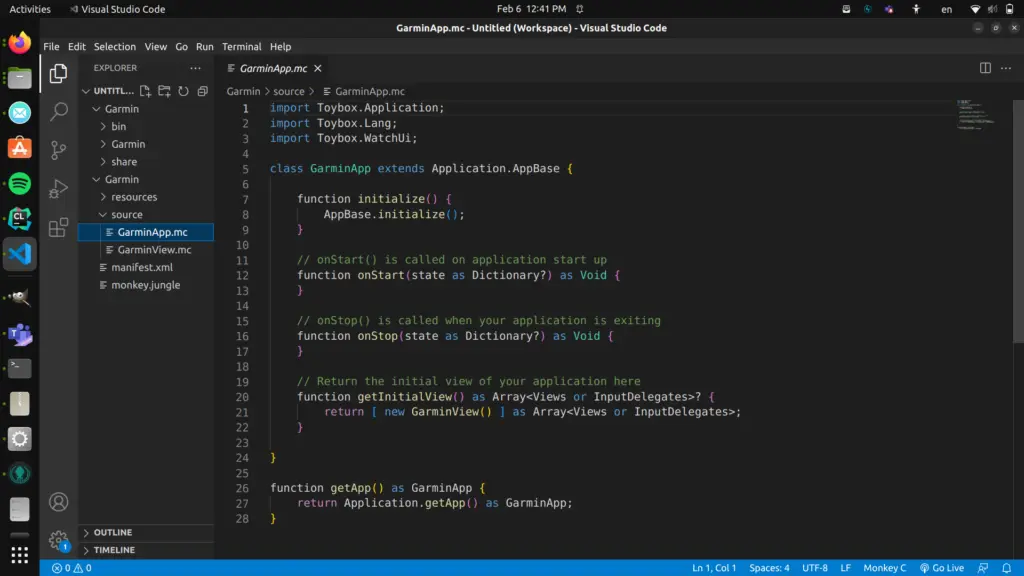
You should now have a file structure built with a Resources folder, Source folder, and a manifest.xml file and a monkey.jungle file.
4. Create Developer Key
Before we can run the watchface on the simulator, we need to make a developer key. Type Ctrl+Shift+P again to pull up the command search. Search for “Monkey C: Generate a Developer Key.” It should open up a file manager screen from which you can choose a location for your key to be stored.
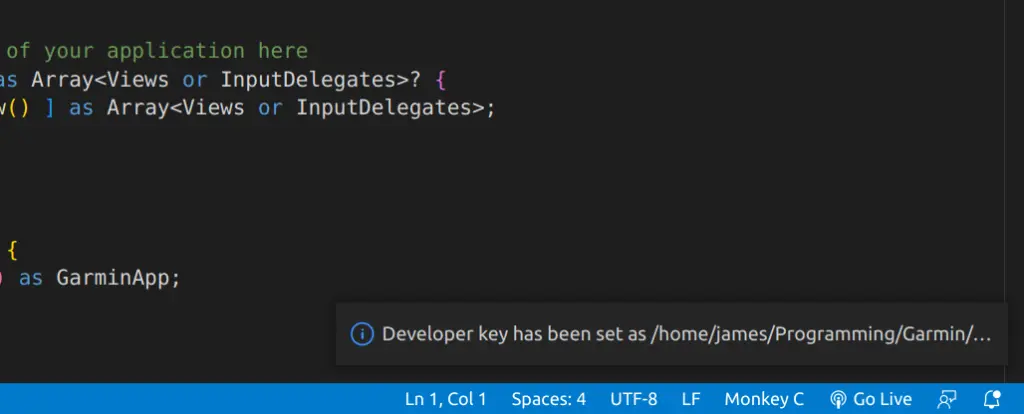
Once you select the folder it will display a message like the one above in the bottom right of the screen. You are now ready to test run the watchface on the simulator.
5. Run the Watchface on Simulator
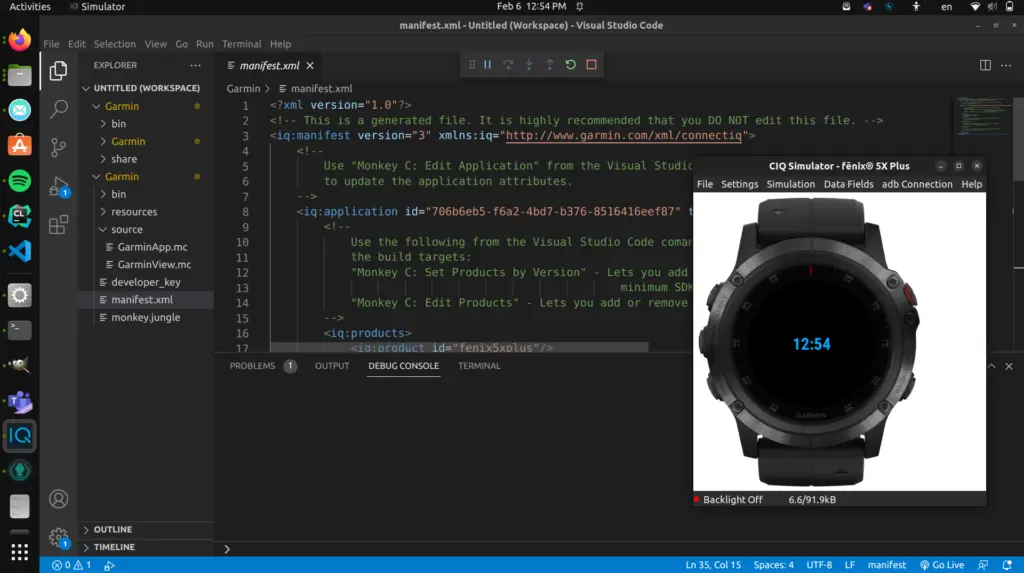
Type Ctrl+Shift+P once again and search for the command “Monkey C: Edit Products.”
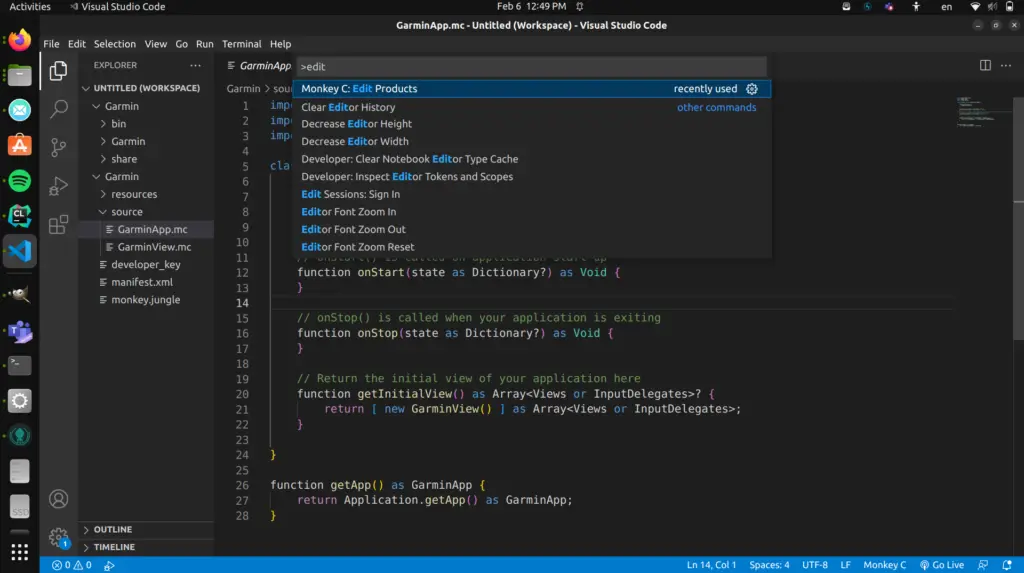
Find a watch model from the resulting drop-down menu and click on the checkbox next to it. This will set it as the target device for use in the simulator. Now navigate to the GarminApp.mc file in the Source folder using the file manager sidebar on the left.
Go to the top and click on Run>Run without Debugging. If all goes well, it should take a few seconds to open the simulator and run the watchface. Your development environment is now all set!